Flash
Insert a unpowered Arduino Portenta X8 into the Pika Spark and locate the bottom-mounted DIP switches used for alternating between bootloader and application.
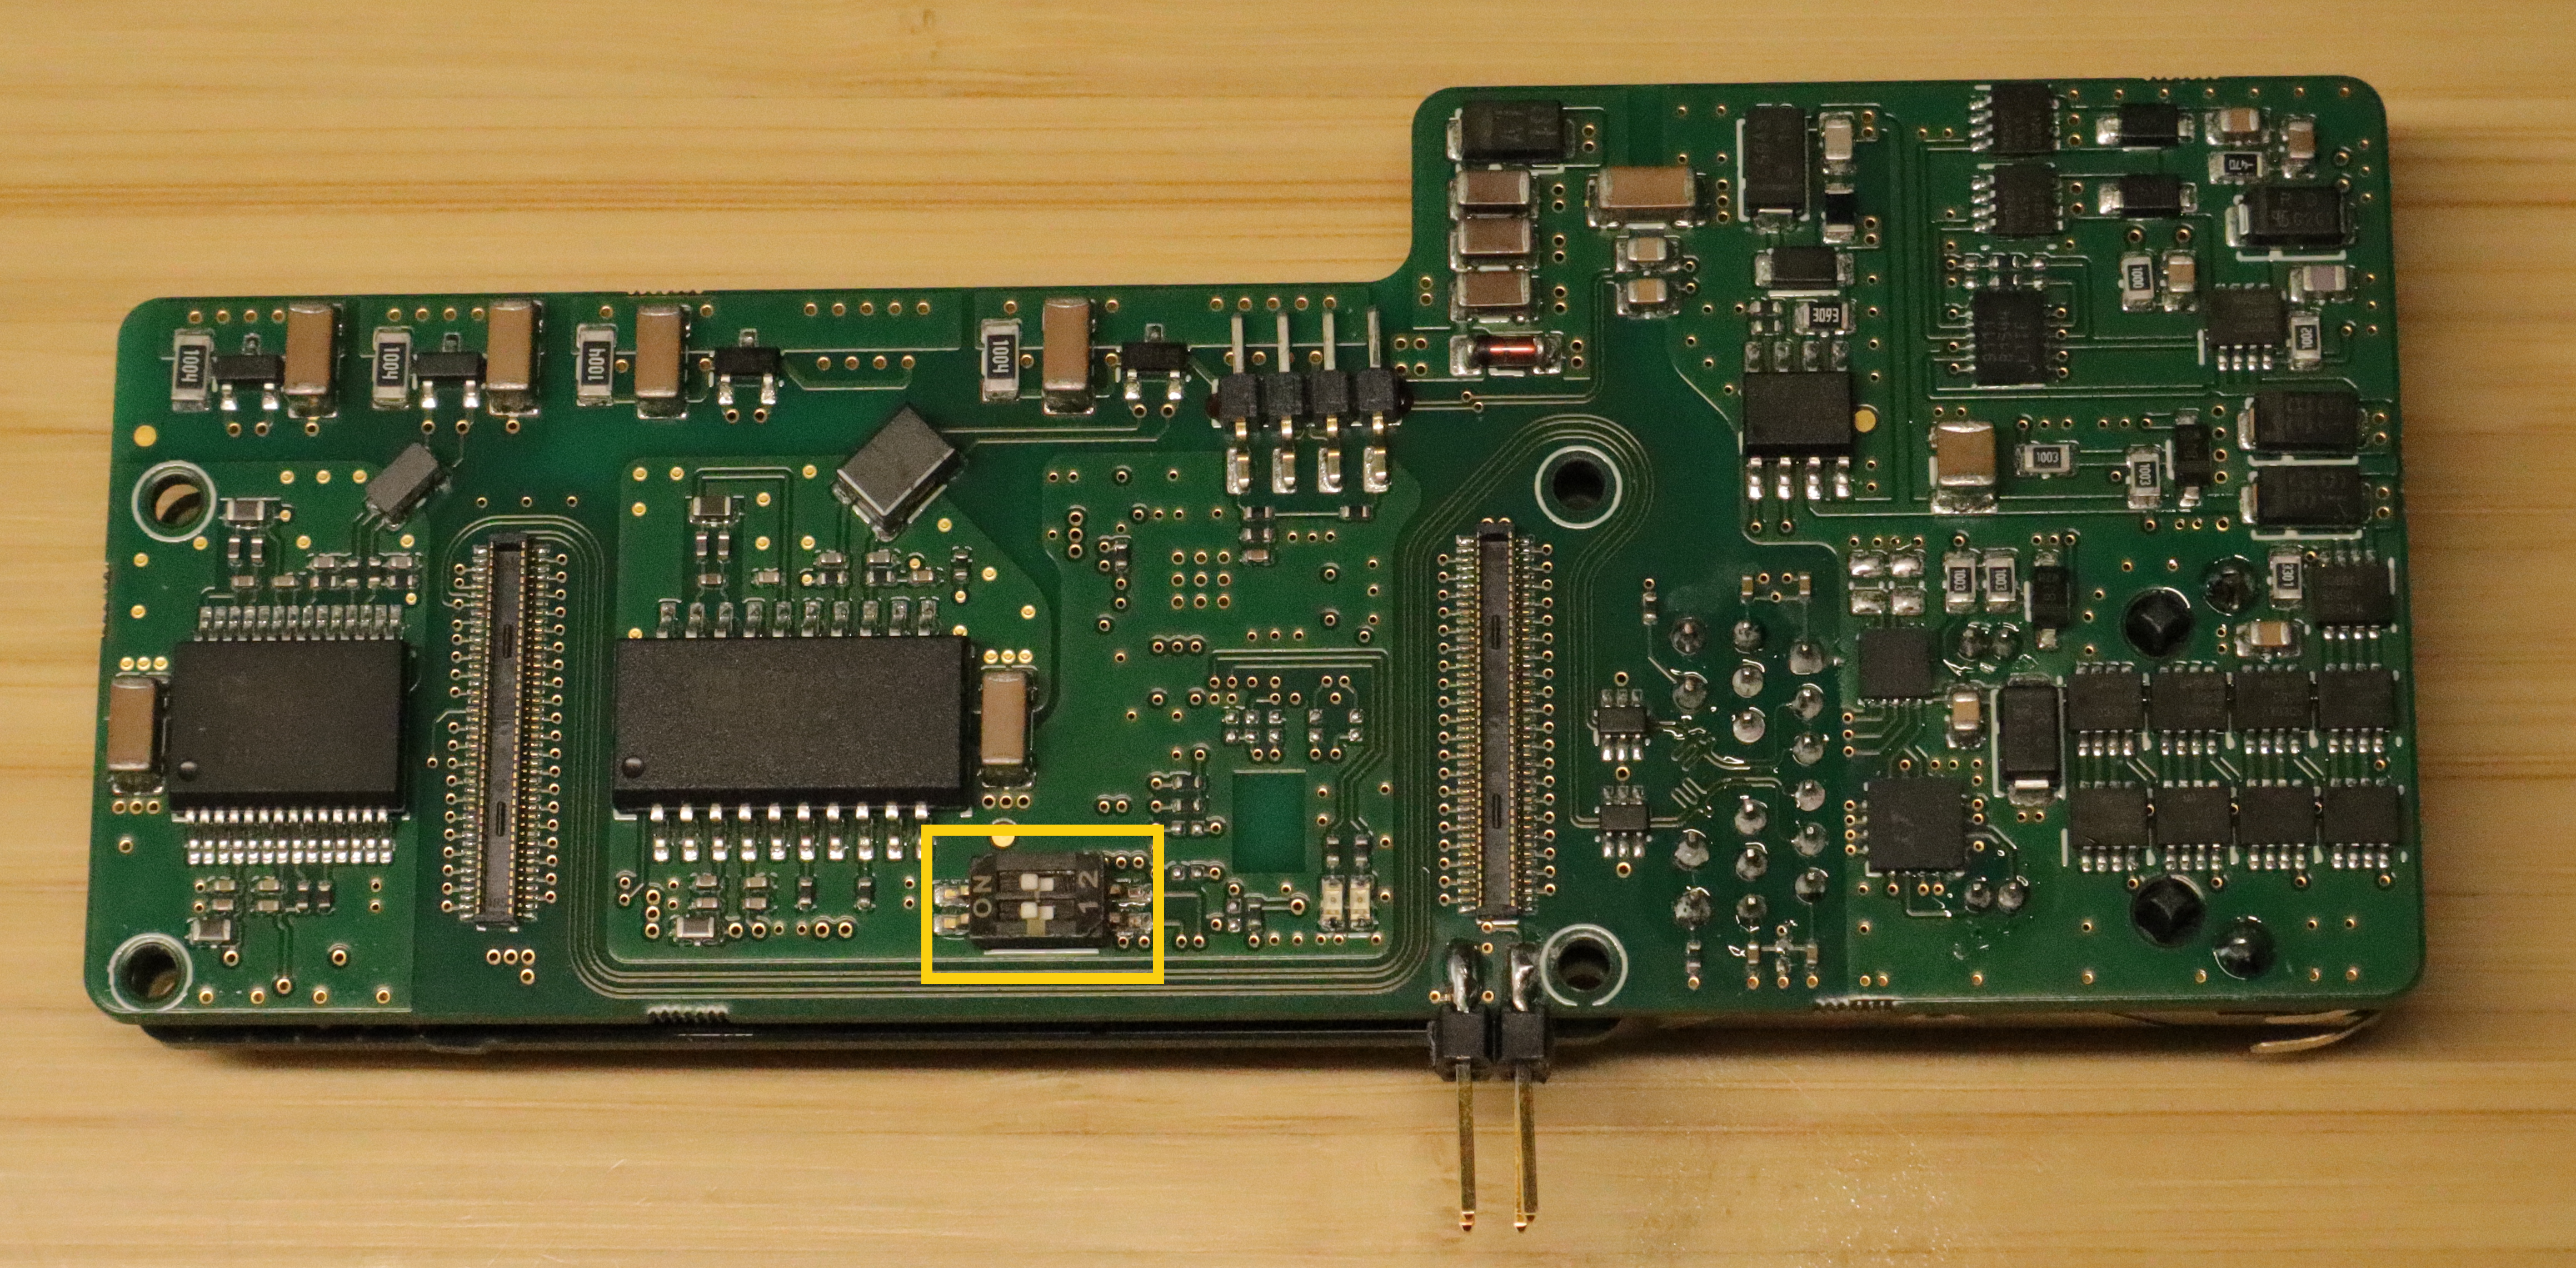
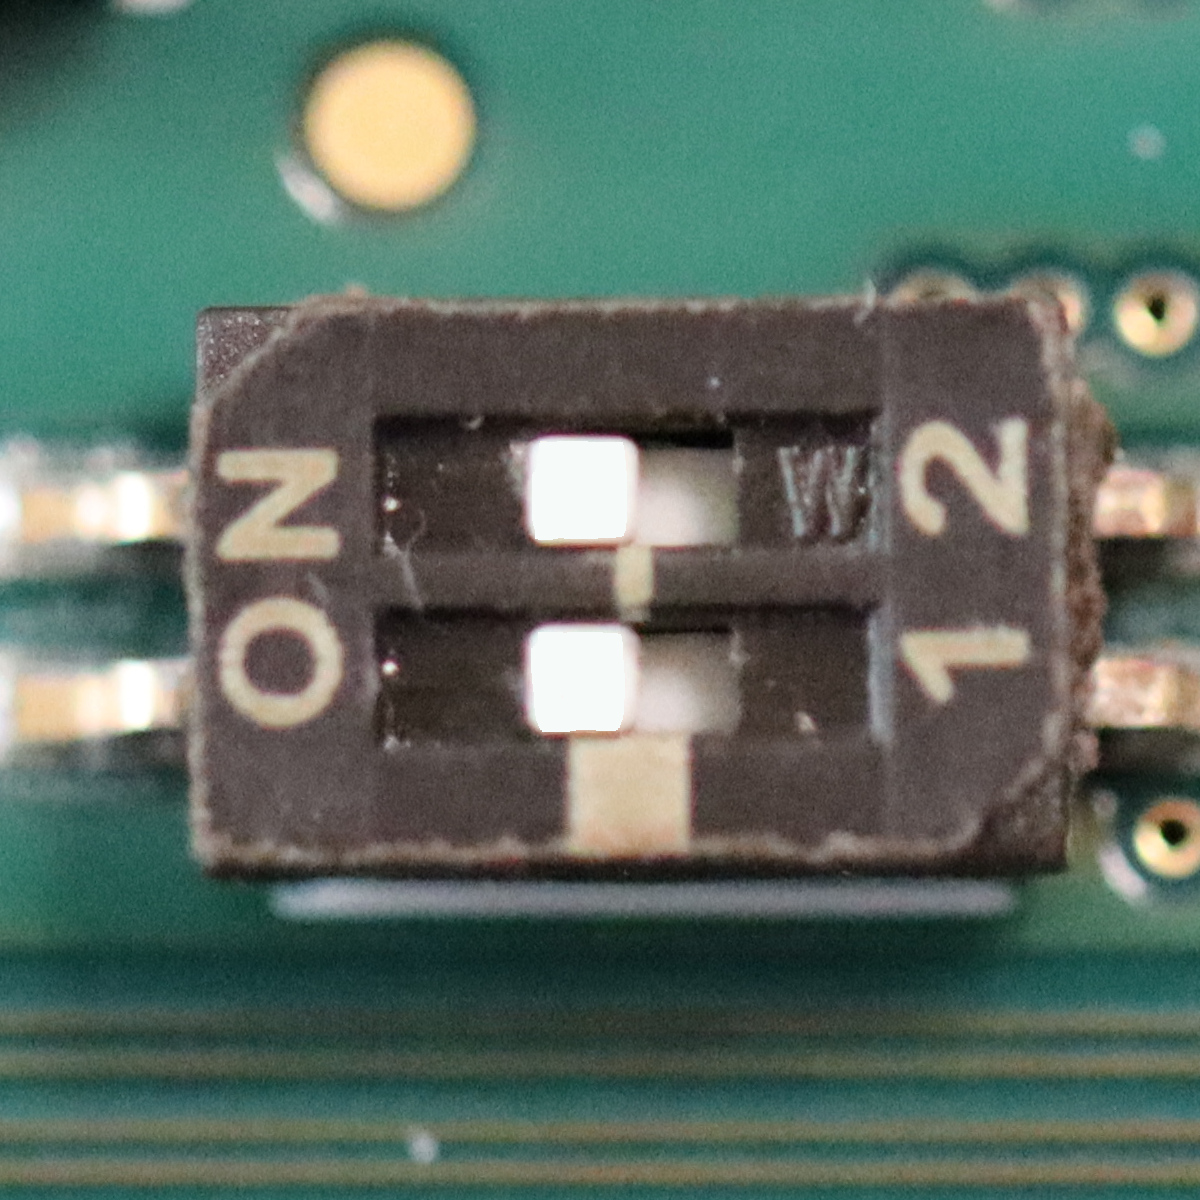
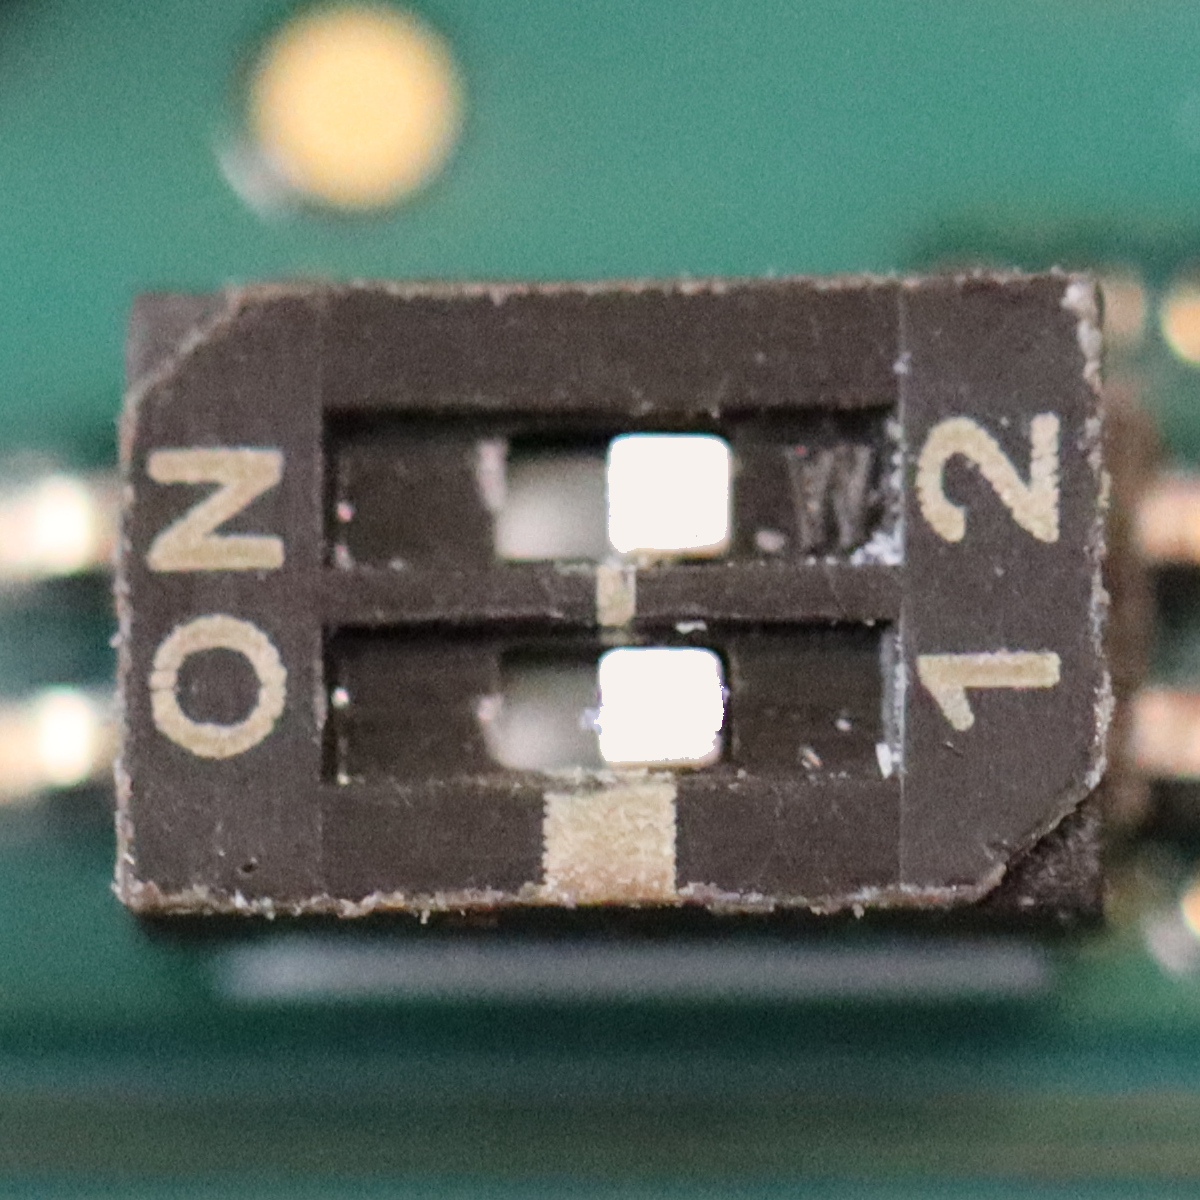
Set both DIP switches for booting the bootloader on power-up (DIP switches to ON position).
Connect the Arduino Portenta X8 USB-C connector with your PC. A “SE Blank M845S” device will be enumerated (dmesg -wH).
usb 5-2.2: New USB device found, idVendor=1fc9, idProduct=0134, bcdDevice= 1.01
usb 5-2.2: New USB device strings: Mfr=1, Product=2, SerialNumber=0
usb 5-2.2: Product: SE Blank M845S
usb 5-2.2: Manufacturer: NXP      SemiConductors Inc
hid-generic 0003:1FC9:0134.000B: hiddev2,hidraw6: USB HID v1.00 Device [NXP      SemiConductors Inc  SE Blank M845S ] on usb-0000:3d:00.0-2.2/input0
Copy all files required for flashing to a temporary location (i.e. /tmp/pika):
mkdir -p /tmp/pika
DEPLOY_FOLDER=/tmp/pika

cp -L build-lmp-base-xwayland/deploy/images/portenta-x8/imx-boot-portenta-x8 $DEPLOY_FOLDER
cp -L build-lmp-base-xwayland/deploy/images/portenta-x8/u-boot-portenta-x8.itb $DEPLOY_FOLDER
cp -L build-lmp-base-xwayland/deploy/images/portenta-x8/sit-portenta-x8.bin $DEPLOY_FOLDER
cp -L build-lmp-base-xwayland/deploy/images/portenta-x8/lmp-devel-arduino-image-portenta-x8.wic $DEPLOY_FOLDER
Copy and extract manufacturing tools (once):
cp -L build-lmp-mfgtool/deploy/images/portenta-x8/mfgtool-files-portenta-x8.tar.gz $DEPLOY_FOLDER
cd $DEPLOY_FOLDER
tar xvf mfgtool-files-portenta-x8.tar.gz
cd mfgtool-files-portenta-x8
Flash image using uuu:
./uuu full_image.uuu
Note: Ensure that the appropriate udev rules have been installed (once):
git clone https://github.com/pika-spark/pika-spark-udev
sudo cp pika-spark-udev/99-uuu.rules /etc/udev/rules.d/
sudo udevadm control --reload-rules
sudo udevadm trigger
After flashing disconnect the USB-C connector of the Portenta X8 (power-down) and set the DIP switches for booting the application on power-up (DIP switches to “OFF” position).
Connect the Portenta X8 USB-C connector with your PC. A “Portenta X8” device will be enumerated (dmesg -wH).
usb 5-2.2: New USB device found, idVendor=2341, idProduct=0061, bcdDevice= 5.04
usb 5-2.2: New USB device strings: Mfr=1, Product=2, SerialNumber=3
usb 5-2.2: Product: Portenta X8
usb 5-2.2: Manufacturer: Arduino
usb 5-2.2: SerialNumber: 2D16BA09DAB6FAD9
Enable Pika Spark overlay:
within u-boot (shell exposed via Debug-UART) before kernel boot (stop u-boot by clicking a key within u-boot timeout):
setenv carrier_custom 1
setenv overlays ov_som_lbee5kl1dx ov_som_x8h7 ov_carrier_pika_spark
saveenv
reset
within user space after kernel boot:
fw_setenv carrier_custom 1
fw_setenv overlays ov_som_lbee5kl1dx ov_som_x8h7 ov_carrier_pika_spark
fw_saveenv
Log into your image using adb:
sudo apt-get install adb
adb shell
Set the terminal emulator to xterm and resize your terminal for best representation:
export TERM=xterm
resize